Children are notoriously picky eaters, so when it comes to preparing healthy food for kids that they'll actually eat, sometimes you've got to add some fun to the equation. When mine were young, I found that getting them to participate in the preparation was a good way to encouraged them, because they were more likely to eat what they helped make. I found cooking activities were particularly successful when they and their friends were between the ages of 5 and 8, when hand-eye coordination is excellent and the willingness to do adult-supervised activity is still a plus.
By the age of 3, children can pour measured ingredients into bowls, peel bananas, tear lettuce, open packages, sort ingredients, and place toppings on food. From ages 4 and up they can help grease pans, knead and shape dough, slice soft foods like bananas, attempt to measure accurately, wash fresh produce, and spread jam, margarine, or peanut butter.
Cooking teaches children the spirit of cooperation, a little bit of math, and a smidgen of chemistry. But best of all is that it teaches them to appreciate the effort and artistry that goes into the preparation of food. And when that lesson sinks in, they're far more likely to eat something if they've helped make it!
Here are several tried-and-true hands-on food projects, some more involved than others, that my kids and their friends have enjoyed when they were young and were most often requested. And make sure to explore the entire Veg Kids and Teens page on VegKitchen for lots of easy, healthy recipes for vegetarian and vegan kids and teens.
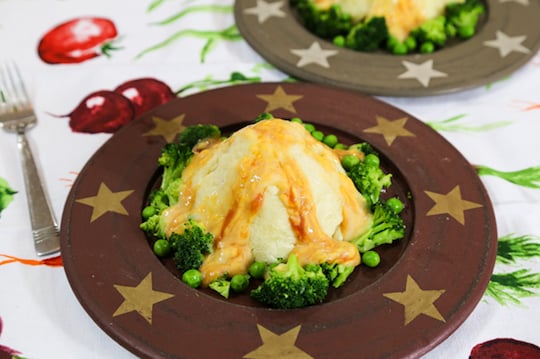
MASHED POTATO "VOLCANOES"
4 servings
My kids never wanted mashed potatoes until we read The Trouble With Grownups, a "Berenstain Bears" book. In one scene, the cubs are bored with the same old dinner. Mama and Papa scold the cubs for building volcanoes with their mashed potatoes. I see nothing wrong with making food more amusing, especially if that inspires kids to eat it. When they were young, my sons asked for "mashed potato volcanoes" regularly, and it accomplished the feat of getting them to eat two vegetables in one dish.
Volcanoes
- 4 large potatoes, peeled and diced
- 2 tablespoons vegan buttery spread
- ½ cup unsweetened nondairy milk
- Salt to taste, optional
Hot Lava
- 1 cup unsweetened nondairy milk
- 2 tablespoons unbleached flour
- ½ cup grated cheddar nondairy cheese
- 2 tablespoons ketchup
Greenery
- About 1 cup frozen peas and/or small broccoli florets, steamed
Put the diced potatoes in a large saucepan and cover with water. Bring to a simmer, then cover and simmer over medium heat until tender, about 15 minutes.
When the potatoes are done, drain them and transfer to a mixing bowl. Add the vegan butter and nondairy milk and stir in. Mash the potatoes well with a potato masher, then add a little salt if desired.
For the hot lava: Heat the nondairy milk in a small saucepan. Dissolve the flour in just enough water to make it smooth and flowing. When the milk is hot, stir the dissolved flour slowly into the saucepan. Sprinkle in the cheese and stir until it melts. Simmer the mixture gently until smooth and thick. Stir the ketchup into the sauce, but leave some red streaks showing, so that it looks "fiery."
Divide the mashed potatoes among 4 serving plates. Have everyone shape them into mountains, then press the tops down lightly to flatten, and finally make a small indentation at the very top with their thumb. Then, have the kids arrange some of the peas or broccoli florets around the volcano.
Let each child pour some of the "lava" into the indentation at the top of each "volcano" with a small ladle. It should flow down the sides. It's fine if it drips over the "greenery" too. Eat at once, before the lava solidifies into magma!
TACO PARTY
Serves a small crowd with small hands
Way back when my older child was in kindergarten, one of the mothers always brought an attractively arranged platter of miniature taco shells and various fillings to class parties. I was always amazed at how voraciously the little ones devoured the taco shells, filled with lettuce, tomatoes, grated cheese, and refried beans. There's no mixing or measuring; just put out as much as you think you'll need of each item. Kids can help by tearing the lettuce by hand, and arranging the taco shells, diced tomatoes and grated cheese in bowls or on a platter. But what they enjoy most is making their own tacos.
- Miniature taco shells, as needed
- 16-ounce can vegetarian refried beans
- Shredded lettuce, as needed
- Finely diced, firm ripe tomatoes, as needed
- Grated nondairy cheddar cheese, as needed
- Mild taco sauce, optional
Heat the taco shells according to package directions. Place on a serving plate.
Combine the refried beans in a small saucepan with ¼ cup water. Stir together and cook until warmed through. Transfer all or part of the warmed beans to a serving bowl.
Arrange the lettuce, tomatoes, and cheese in individual small serving bowls or in small mounds on a platter.
Have everyone fill their tacos with a little of the refried beans, then some lettuce, tomatoes, and cheese. Whoever wishes some can top their taco with a little sauce. Serve with plenty of napkins!
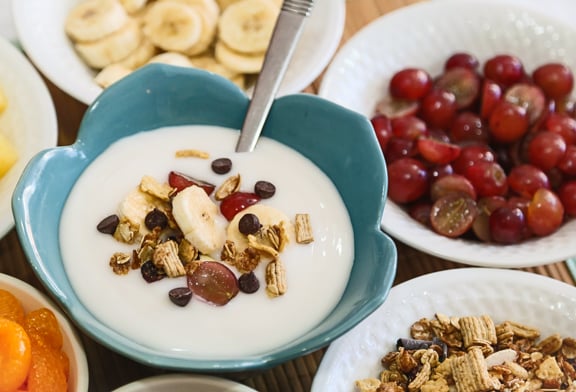
YOGURT AMBROSIA
4 to 6 servings
Young children don't often like dishes in which foods are "mixed," or in which the ingredients are "touching." However, I found that this is not always the case when they control what's being mixed and what is touching what. This delicious concoction, which each child makes for themselves, can be served as a healthy dessert or as part of a change-of-pace weekend lunch with fresh bread. Without prompting on my part, I observed my kids and their friends making designs, patterns, and even funny faces on the yogurt with the fruits and other ingredients. And, wonder of wonders, they even ate it! Use as many organic ingredients as you can for this recipe.
- 1 to 2 medium bananas, sliced
- 8-ounce can unsweetened pineapple tidbits, drained
- 1 large pear, peeled and diced
- ½ cup small seedless grapes
- ¼ cup dark or golden raisins, or diced dried apricots
- ¼ cup semi-sweet chocolate chips, optional
- 16 ounces (2 cups) nondairy vanilla yogurt (such as coconut), or as needed
Place all the ingredients except the yogurt into separate, small bowls. Divide the yogurt among 4 to 6 individual serving bowls.
Let everyone take a little of whichever ingredients they'd like to dress up their ambrosia.
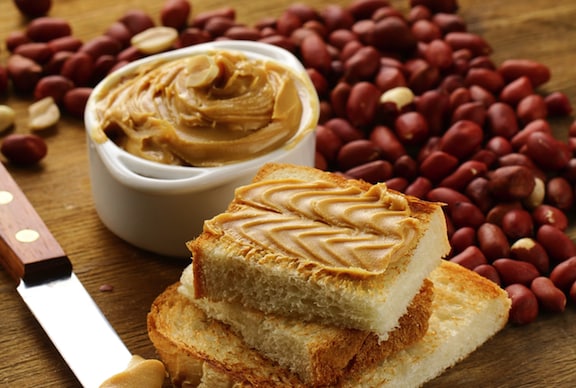
HOMEMADE NUT BUTTER
Makes about ¾ cup
If using fresh peanuts in the shell, kids will have fun shelling them. They also like to take turns turning the food processor on and off, as needs to be done several times, and they can scrape down the sides with a plastic spatula. But the most fun in this case is in the watching: After several minutes of whirling, they marvel at seeing how the peanuts are transformed into a smooth butter!
- 1 cup shelled peanuts (try cashews as well)
- 1 tablespoon light vegetable oil
- 1 tablespoon agave nectar or maple syrup
- Place the peanuts in a food processor. Process at high speed until the nuts begin to hold together.
Add the oil and agave nectar, and continue to process. Scrape the sides of the container from time to time, and process some more, until the peanut butter is smooth, or at the desired consistency, if you'd like to leave it a bit chunkier.
Transfer the peanut butter to a lidded container. For easier spreading, microwave for a few seconds before using.
Tips:
- Dry-roasted peanuts from a jar work just fine, but using fresh, roasted peanuts (and having the kids shell them) results in a more vivid flavor.
- Make sure that no children you serve this to are allergic to peanuts—it's a more common allergy than you'd think, and a very serious one.
- And finally, don't try doing this in a blender—it won't work!


Brianna says
Great recipes. I will have a quality, enjoyable and very healthy time preparing this meals with my kids. Thanks you for this post!